

Hi, there today am super excited to guide you on how to create a profitable e-commerce website store. Actually, e-commerce is the need of the hour in this pandemic. Everything is shifting online, why not shopping to go Online.
If you have any of these questions:
How to create a professional e-commerce website?
How to create an e-commerce store?
Do you want to create an e-commerce store?
How to design a website?
If the answer is Yes, Then this is the perfect guide for you. Here is the demo of the website that we are going to create step by step.
Let’s get started
Purchasing a domain and Hosting
As I have already told you that it’s going to be a perfect guide. Therefore, firstly we will understand what domain and Hosting is? A domain is the name of your website for example www.daraz.pk or www.noorahmadharal.com. Domains comes with many suffixes such as .com, .net, .pk,.in. You may select any of these types, but I recommend buying .com Because it has many advantages.
Hosting is 24/7 hours live computer on which we store our data. We need hosting so that we can fetch our site data anytime either day or night.
Installing WordPress to create an e-commerce website:
When we have bought domain and Hosting, now we will install WordPress from c penal. We are using WordPress as a CMS because it’s super easy to manage. Besides creating an e-commerce website by using WordPress is also very easy. If you are a beginner and thinking about creating an e-commerce website just follow any tutorial from youtube.
Installing theme:
After installing WordPress now, we will install a theme to create our e-commerce website. Theme is the overall look and style of your website. Just installing a theme you can get a beautiful style.
To install a theme hover on appearance and select theme. Now click on add new theme and search for woostify. Woostify is a very amazing e-commerce website theme.
Installing the Best plugin for e-commerce
Before installing the plugin firstly we will Understand What are plug-in and what they do? Plugins are a small software and they enhance the functionality of websites. We can get new features on our website just by installing a plugin.
Here are some important Plugins.
- Woo-commerce
- Variation swatches for woo-commerce
- Elementor
- Contact form 7
- Product Share
If we use a large number of plugins on our website, it will reduce the speed. We should try not to exceed ten plugins.
Design Hero Section:
As all the setting has been completed, Now we will design our website. Hero Section is the main section of any website. Whenever someone searches our website this section appears to oneself.

Here are the steps:
- Create Home Page
- Makes it a landing page from the setting.
- From the reading section select Home as Landing Page
- From the top bar select edit with elementor
- Create a single section
- Now firstly we will design content on the section then we will add a banner behind it.
- From the Elementor addon drag the paragraph and drop it in the layer.
- Write “We’re Proud to Introduce”
- Now drag Heading and drop it in the layer
Type” Fashionable Fit<br>
Trending Style<br>
Men Wear”
- Now drag a Button and drop it in the layer.
- You can change the styling of the button by adding margin and padding
- Here the content designing is completed.
- Now we will add Banner behind this content.
- For creating a banner we can use Canva
- After creating design upload the banner behind the content.
Design Category Block
- First, we will create a header for Category.
- Drag paragraph and drop it in the layer section
- Write ”Passion For Fashion”.
- From Advance, styling add -25 px padding from bottom
- Now drag the heading drop it in the layer section
- Type “ Shop By Category”
- From Advance, styling add 40 px padding from bottom
- For creating the below style follow the instructions
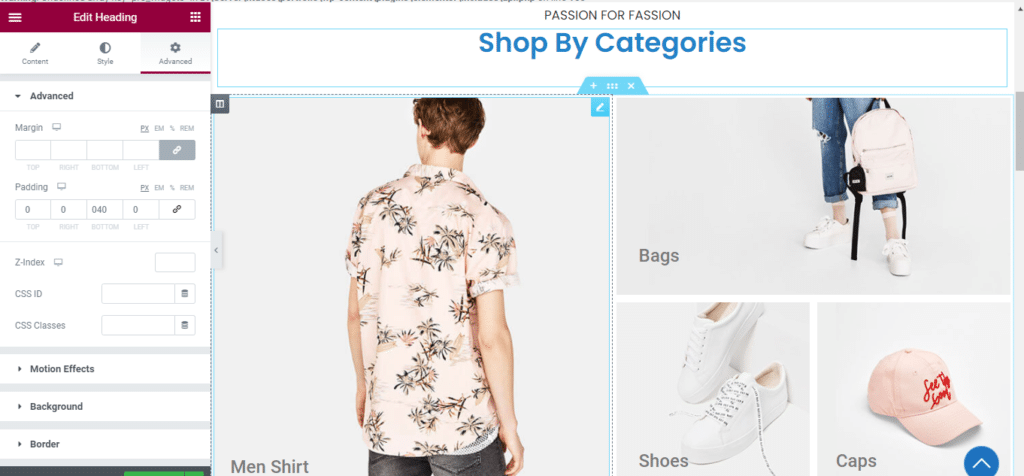
- Create two-layer sections
- In the Right-sided section drag the inner section and drop it at bottom of the right side block
- Inner Section will create two further sections below the right block
- Now drag images into each of the given Blocks and caption them accordingly.
- After placing images in sections for styling type’’ woostify-shop-category’’ in advance CSS classes.
- Well, the category page is designed.
Design New Arrival Section
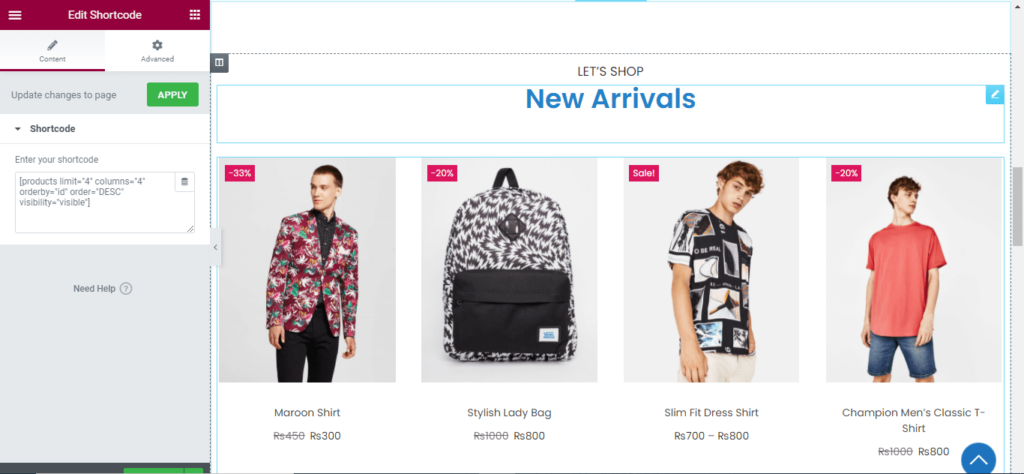
- For creating this section just copy the block of category and paste it.
- This will not only save our time but also will have the same style we just have to change the text.
- For showing these products we will use shortcodes.
- For getting shortcodes to go to woo-commerce shortcodes documentation and copy the recent products code and paste it under the content shortcode.

- For creating the above section create three layers
- In every three layers drag and drop inner sections
- Now drag the icon and drop it in each left-sided section
- Drag heading and drop it in each right-sided section
- Adjust the style and size accordingly
Creating Popular This Week Section
For creating this section copy the New Arrival Section and paste it under the popular section. Now we just need to change the shortcode and Heading text.
Creating Header
- For creating the header we need all the pages that we are going to show on our main menu.
- For creating all these pages we just need to “Create Page and insert Shorcode”.
- After creating All pages Select them in Main Menu.
Creating Footer For E-commerce website:
For creating the footer here we have four (4) columns.
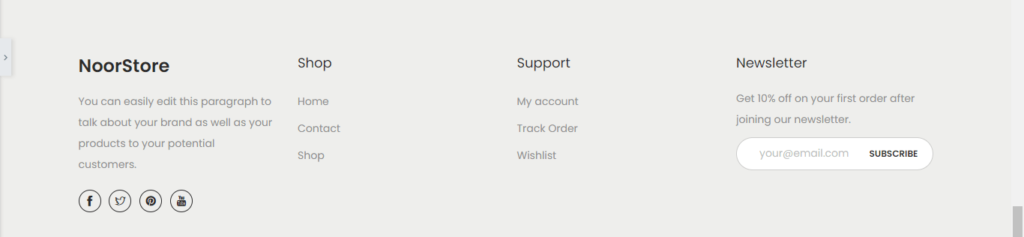
Footer 1
Add text widget and write something about your e-commerce store in few lines.
Footer 2
For creating the second number footer firstly we have to create a Menu named Shop and placed all the necessary pages inside it. Then we will select Shop Menu as footer 2 widget.
Footer 3
The procedure of creating the 3rd footer is the same as above mentioned footer 2.
Footer 4
Select the Newsletter widget as the 4th footer.
What things an E-commerce website must have?
Here are some features that an e-commerce website must have to run a successful business.
- Professional website design
- Product share option
- Local and international payment gateway
- Wishlist feature
- Better customer support
- Blog page to attract audience from Google.
Very informative article
Help me a lot
Thanks a lot🙌